PC-BSD Version: 7.1.1
Desktop: K Desktop Environment (KDE)
KDE Version: 4.2.4
PC-BSD မွာ ေဇာ္ဂ်ီဖြန္႔ install လုပ္ဖူးသူရွိပါသလား? PC-BSD က KDE desktop environment ကိုသံုးၿပီး FreeBSD base system ဆိုေတာ႔ Linux နဲ႔ေတာ႔ သိပ္ၿပီး အရမ္းကိုကြာျခားမႈေတာ႔ မရွိပါဘူး၊ သိပ္ၿပီး ကြဲျပားျခားနားမႈမရွိေပမယ္႔ တကယ္ေတာ႔ system ခ်င္းက တျခားစီပါပဲ။ Linux အတြက္ zawgyi keyboard packages ေတြအလြယ္ေတြရေနၿပီးျဖစ္ေသာ္လည္း PC-BSD အတြက္ မရွိေသးဘူးထင္ပါတယ္။
ေဇာ္ဂ်ီဖြန္႔ကို သြင္းဖို႔အတြက္ စရေအာင္..
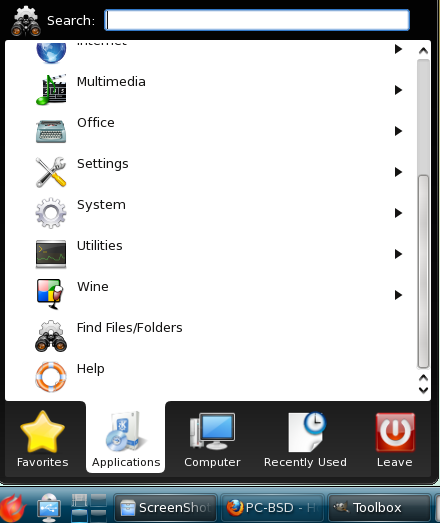
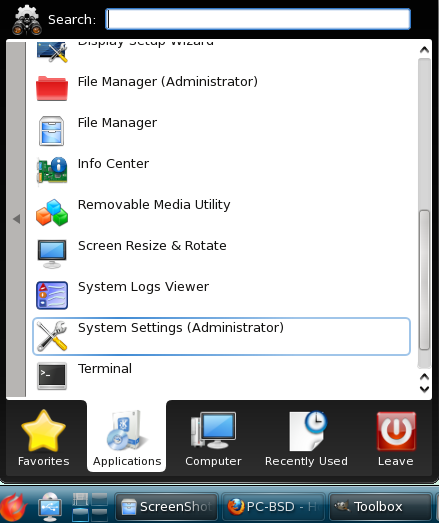
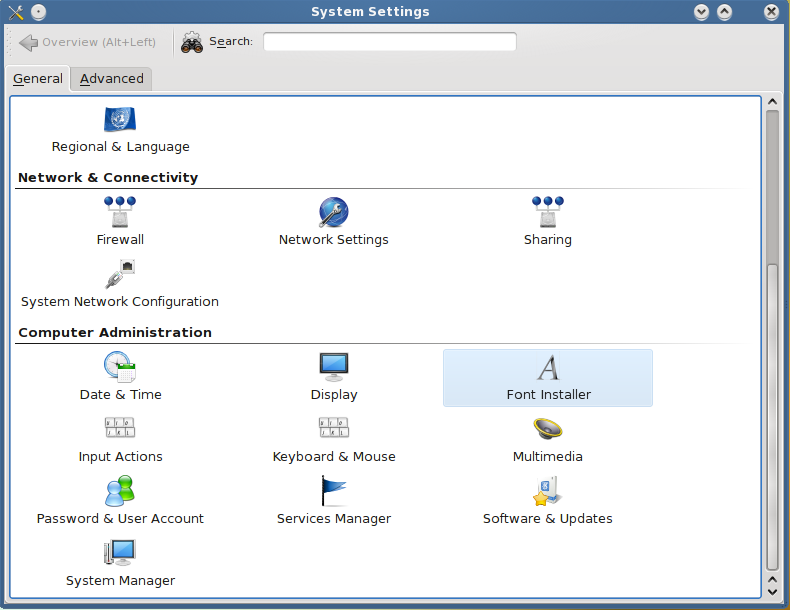
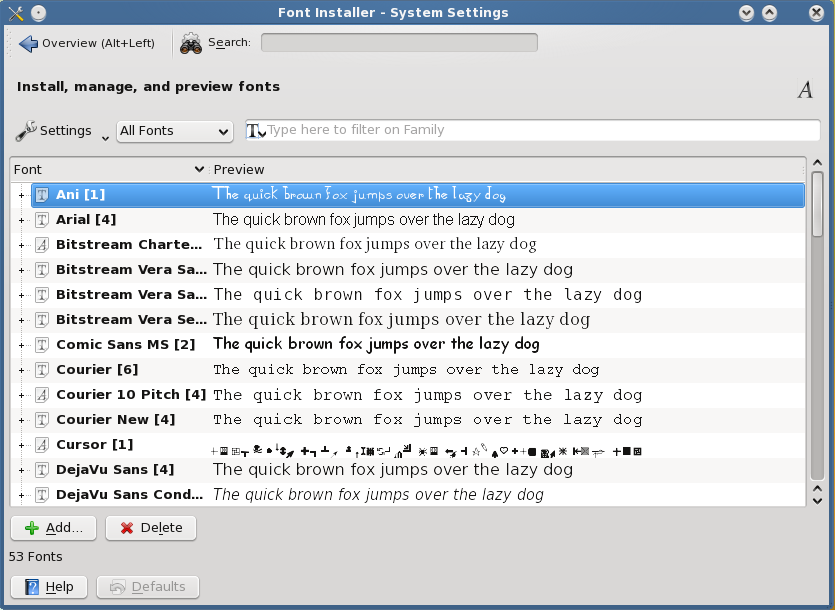
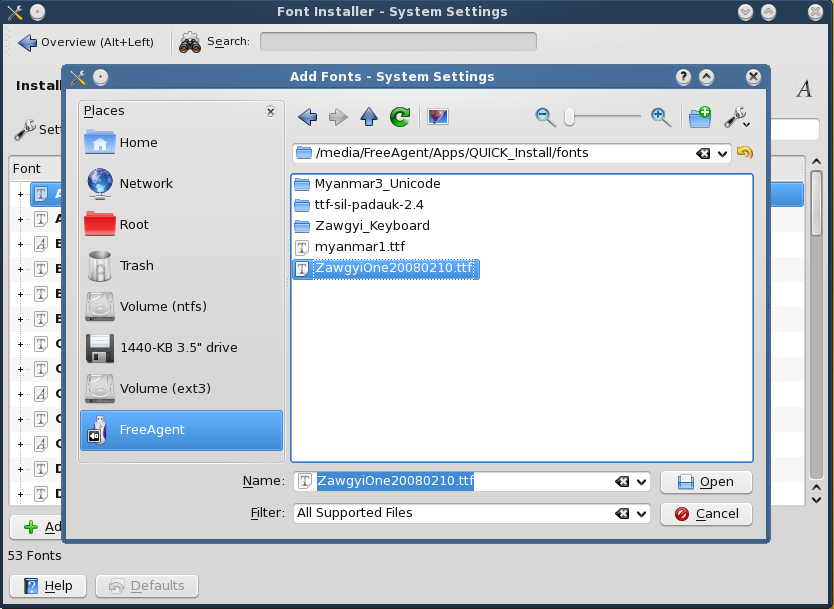
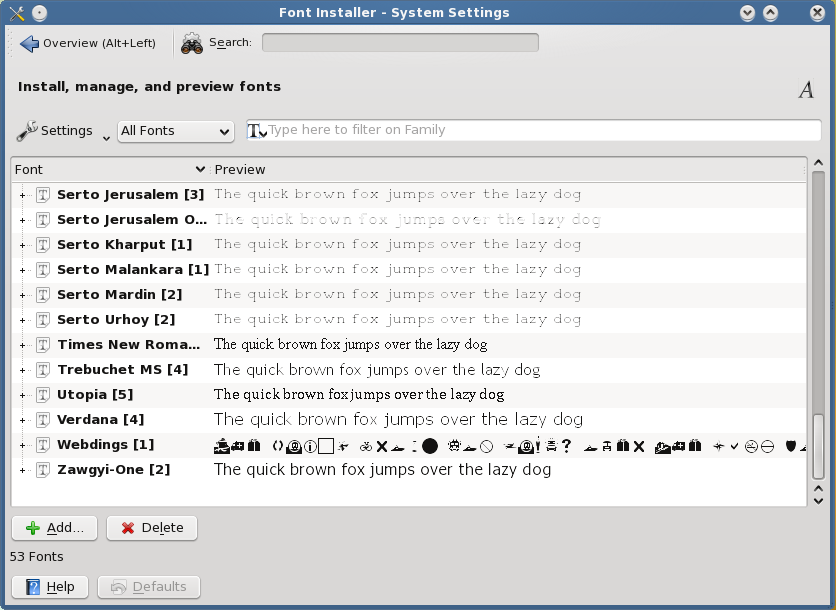
Applications Launcher (Start Menu နဲ႔တူတူပါပဲ) ကိုသြားၿပီး Applications > System > System Settings ကိုဖြင္႔ပါ။ ဒီေနရာမွာ Administration Tasks ေတြလုပ္ေဆာင္ဖို႔အတြက္ root password ကိုေတာင္းခံပါမယ္.. ထည့္သြင္းေပးလိုက္ပါ။ System Settings Window ႀကီးပြင္႔လာမယ္။ အဲဒီမွာ General နဲ႔ Advanced ဆိုၿပီး Tabs ႏွစ္ခုထဲက General Tab မွာ Computer Adminstration Category ေအာက္က Font Installer ကို Double Click ႏွိပ္ေပးပါ။ Font Installer Window ပြင္႔လာပါမယ္။ အဲဒီခါက်ရင္ Add button ကိုႏွိပ္ၿပီး ေဇာ္ဂ်ီဖြန္႔သိမ္းထားရာ Folder ကို browse လုပ္ၿပီး ေရြးယူ install လုပ္ပါ။ ေအာက္က ပံုေတြကိုၾကည့္ပါ။
[caption id="attachment_221" align="alignnone" width="440" caption="Picture 1"]
 [/caption]
[caption id="attachment_222" align="alignnone" width="439" caption="Picture 2"]
 [/caption]
[caption id="attachment_223" align="alignnone" width="480" caption="Picture 3"]
 [/caption]
[caption id="attachment_224" align="alignnone" width="480" caption="Picture 4"]
 [/caption]
[caption id="attachment_225" align="alignnone" width="480" caption="Picture 5"]
 [/caption]
[caption id="attachment_226" align="alignnone" width="480" caption="Picture 6"]
 [/caption]
ၿပီးရင္ ေဇာ္ဂ်ီကီးဘုတ္ကို သြင္းရေအာင္ Applications Launcher > Applications > System > Terminal ကိုဖြင္႔ပါ။ ၿပီးရင္ ေအာက္က command line နဲ႔ ေဇာ္ဂ်ီ xkeybaord symbol ကိုသြင္းပါ။
% su
# cp mm /usr/X11R6/share/X11/xkb/symbols
# cp mm /usr/X11R6/share/X11/xkb/symbols
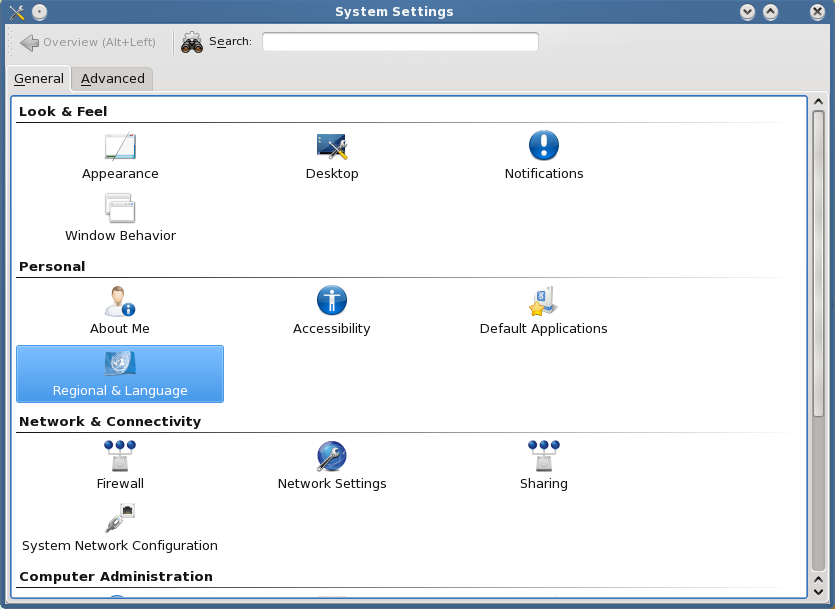
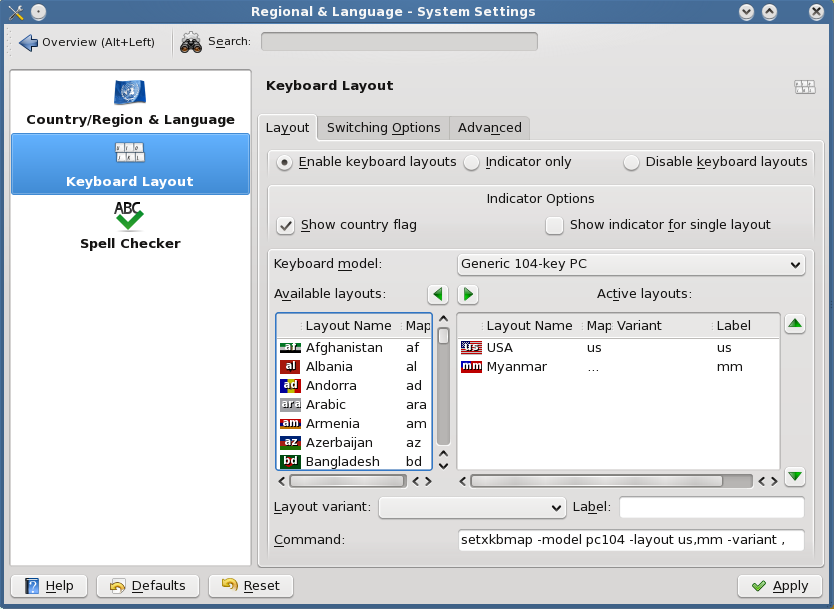
ဒီအဆင္႔ၿပီးရင္ေတာ႔ Keyboard Layout Setting ကိုသြားၿပီး Myanmar Keyboard Layout ကို ထည့္ရပါမယ္။ ေစာေစာက က်ေနာ္တို႔ဖြင္႔ခဲ႔တဲ႔ System Settings Window မွာ General Tab မွာပဲ Personal Category ေအာက္က Regional & Language ကို Double Click ႏွိပ္ၿပီး ဖြင္႔ပါ။ Regional & Language Window ေပၚလာတဲ႔အခါ လက္၀ဲဘက္မွာရွိတဲ႔ Keyboard Layout Tab ကိုသြားပါ။ အဲဒီမွာ လက္ယာဘက္မွာရွိတဲ႔ Keyboard Layout Dialog Window ထဲက Layout Tab မွာ Enable Keyboard Layouts option box ေလးကို check လုပ္ေပးပါ။ အဲလို enable လုပ္ေပးလိုက္ရင္ ေအာက္က ႏိုင္ငံအလိုက္ Keyboard Layouts ေတြ available ျဖစ္လာပါတယ္၊ အဲဒီ List box ထဲမွာ Myanmar ကိုေရြးၿပီး အေပၚနားမွာရွိတဲ႔ right arrow ေလးကိုႏွိပ္ေပးၿပီး ညာဘက္ Active Layouts box ေလးထဲေရာက္လာေအာင္ ပို႔လိုက္ပါ။ ၿပီးရင္ Keyboard Layout Switching နဲ႔ Third Level Keys တို႔အတြက္ လက္ရွိ Layout Tab ကေန Advanced Tab ကိုသြားပါ။ အဲဒီထဲမွာ xkb options box ထဲက Key(s) to change layout က Layout Switching အတြက္ျဖစ္ၿပီး Key to choose 3rd level က 3rd level key change ဖို႔အတြက္ျဖစ္ပါတယ္။ ဒီေနရာမွာ အသံုးျပဳသူဆႏၵအေလွ်ာက္ options ေတြကို ထားႏိုင္ပါတယ္။
[caption id="attachment_227" align="alignnone" width="480" caption="Picture 7"]
 [/caption]
[caption id="attachment_228" align="alignnone" width="480" caption="Keyboard Layouts"]
 [/caption]
[caption id="attachment_229" align="alignnone" width="480" caption="xkb options"]
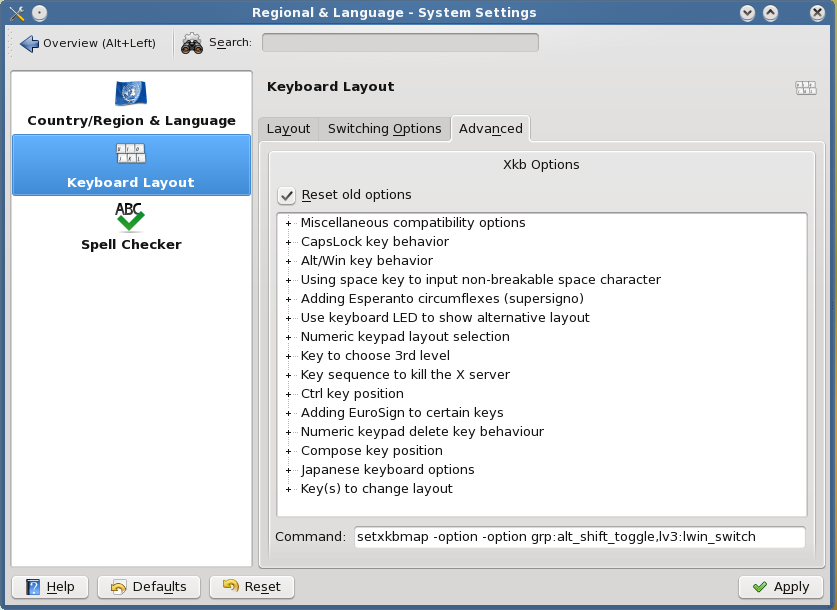 [/caption]
အဲဒါဆိုရင္ ေဇာ္ဂ်ီဖြန္႔ကို ျမင္ႏိုင္ဖတ္ႏိုင္ၿပီး ပံုမွန္အတိုင္း အျခား Linux တို႕ Windows တို႔မွာလို စာရိုက္ႏိုင္ပါၿပီ။
အကယ္လို႔ Firefox မွာ ေဇာ္ဂ်ီဖြန္႔ မျမင္ရပါက ေအာက္က command lines နဲ႔ zawgyi font ကိုထပ္သြင္းေပးပါ..
% su
# cp ZawgyiOne20080210.ttf ~/.fonts
# fc-cache
# cp ZawgyiOne20080210.ttf ~/.fonts
# fc-cache
ၿပီးရင္ firefox browser ကို restart လုပ္ေပးပါက ပံုမွန္အတိုင္း ေဇာ္ဂ်ီဖြန္႔နဲ႔ ဖတ္လို႔ေရးလို႔ရပါၿပီ။
အကယ္လို႔ OpenOffice မွာ ေဇာ္ဂ်ီဖြန္႔ေျပာင္းလို႔မရေသးပါက ေအာက္က command line နဲ႔ zawgyi font ကိုထပ္သြင္းေပးပါ..
# cp ZawgyiOne20080210.ttf /Programs/OpenOffice3.1.0_1/openoffice.org-3.1.0/openoffice.org/basis3.1/share/fonts/truetype
ဒါပါပဲ!
Enjoy it!! :-)

No comments:
Post a Comment